SFF Server Build (Part 1): Short Cables
After 10 years, I decided to replace my 633 MHz home server with something more modern. The fans on the system were making a lot of noise, especially the Slot-1 CPU cooler fan, which I don’t think I can find a replacement for. Also, the motherboard was very choosy about the power supply, meaning I could not use the newer, more energy efficient supplies; the voltage monitors claim the voltage is out of the acceptable range and refuses to continue beyond the POST screen.
I chose the MicroATX form factor, and the most compact case is the Silverstone SG02F because it places the power supply on top of the board. Most other cases I’ve seen have a similar layout to an ATX tower, but with a height reduction.
The wires are long and unwieldy because they assume you are using a normal ATX case, in which case you need relatively long cables depending on how the case is laid out. However when building a SFF machine like this, it gets really untidy. I decided to reduce the length of the cables.
Here’s the before photo of the wiring - the worst offenders are the SATA cables, the case front panel wires, and the SATA power connector.

Power Supply Cables
I chose to use a modular power supply, the Seasonic M12II 520 W. With a modular power supply, the number of loose (unused) cables is greatly reduced - you only plug in what you need.
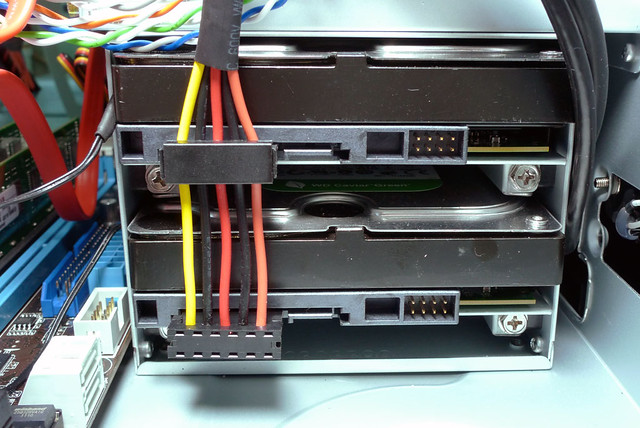
As mentioned earlier, the cables are quite long, and each cable has 3 evenly-spaced SATA power connectors, but in our case, we need only 2 and they are very close together, which forms this ugly cable loop, and an additional tail cable lying around.

Since the power supply cables are detachable, I decided to make shorter power cables for my Seasonic power supply. I couldn’t have done this with a non-modular power supply as it would have likely voided my warranty. All the parts needed to make a custom cable can be purchased from anywhere that sells Molex connectors (in my case, it was easiest to get from element14). It should be noted that the manufacturer is not using Molex though. Here is the parts list:
| Order code | Molex part no | Description |
|---|---|---|
| 1462545 | 39-00-0038 | crimp contact, 18 AWG |
| 1654440 | 39-01-4051 | connector (connects to PSU) |
| 1519807 | 67926-0011 | SATA power connector (IDT) |
| 1519807 | 67926-0040 | SATA power connector feed-to cover |
| 1519809 | 67926-0041 | SATA power connector feed-thru cover |
Feed-to covers are terminal covers - one side will have a cover to protect the exposed wires, whereas feed-through covers have holes on both sides to allow the wire to go right through. The new cable just consists of a 2 power connectors, which fits my configuration exactly.

Since I do not have a tool for assembling these IDT type connectors, I had a really hard time pushing the 18 AWG cables into the IDT connector. Note the 2 black wires are ground, and they are both connected to the same point, so it doesn’t matter which one comes first.
Also, the Molex 5-way connector that fits into the PSU only comes in white from element14 (or maybe I didn’t search hard enough). I had an equally hard time trying to crimp the terminals using my 20-28 AWG crimping tool - it will tear the terminal. As a workaround, I crimped the wire part and the strain relief (the part that grips the rubber) was folded manually using a pair of pliers.

SATA Cables
I can make my own custom power supply cables, but I have no idea how to crimp SATA data cables, and if they would introduce any errors or degrade performance.
Fortunately element14 carries really short 12 cm SATA cables from Multicomp. This avoids the loop of SATA cable from the hard disk to the motherboard.

End Result
At the end, the cables are shorter and do not need to be looped or tied up.

There was but one problem with this: the SATA cables could no longer plug into the right-angle connectors. If you are planning to buy a motherboard for use with this Silverstone case, please buy one that has the connectors located further away, nearer to the edge of the board.
Before modding the power cables, the SATA connector could barely fit as it was obstructed by the power connector.

After modding the power cables, the SATA connector could no longer fit. I could probably have inserted the SATA connector first, then insert the power cable, but I didn’t try that. Instead I used the 3 Gbps connectors near the edge of the board.
The Molex connectors are longer - they protrude out more compared to the original connectors used by the manufacturer. Sadly, the board’s only 6 Gbps ports are here. Another workaround might be to use a right-angle connector here.
